Why Your Headlights Keep Clouding Up After You Polish Them
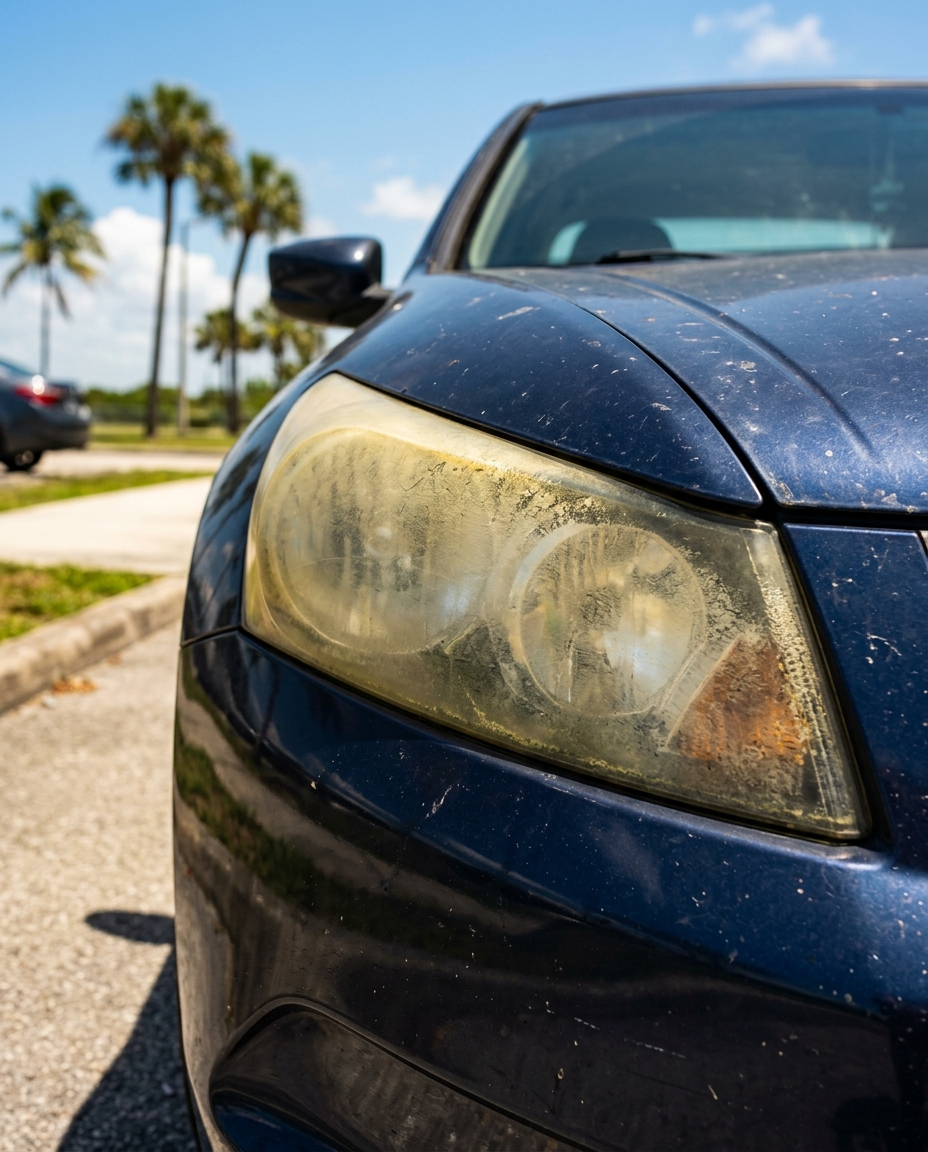
A lot of drivers have polished their headlights, been happy with the results for a couple of months, and then watched them cloud right back up. If that sounds familiar, it is not because the polish was bad — it is because polishing alone does not solve the actual problem.
What Is Actually Happening to Your Headlights
Modern headlight lenses are made from polycarbonate plastic, not glass. From the factory, they come with a thin UV-resistant coating that keeps the plastic clear and protected. Over time — especially here on the Space Coast, where the UV index stays extreme well into October — that protective layer breaks down. Once it is gone, the bare polycarbonate oxidizes and turns yellow or hazy.
The cloudiness you are seeing is not dirt or grime sitting on the surface. It is the plastic itself, chemically changed by years of sun exposure. A wash will not touch it, and neither will most spray-on treatments.
Where Polishing Gets It Half Right
Polishing — done properly, usually starting with wet sanding through progressively finer grits before finishing with a headlight-specific polish compound — removes the oxidized layer. That is why your headlights look clear afterward. The problem is what you are left with: bare, unsealed polycarbonate sitting directly under the Florida sun with no UV protection at all.
Without a UV-blocking sealant applied immediately after polishing, the plastic begins oxidizing again almost right away. Most people are back to cloudy headlights within three to six months. The sealant step is what makes the restoration last. It re-creates the protective barrier the factory coating used to provide. Skip it, and you are polishing on a treadmill.
DIY Kits and Their Limits
Headlight restoration kits from the auto parts store can work, but most of them underemphasize the sealant step. Some include a spray-on coating that holds up for a few months before degrading. If you are doing it yourself, look specifically for a kit that includes a UV sealant or topcoat as the final step — and follow through on that step, not just the sanding and polishing.
Wet sanding is also less forgiving than it looks. Too much pressure, or skipping a grit in the sequence, can leave circular scratches visible even after you buff. If your lenses are deeply pitted or showing cracks along the surface, a standard kit may not have the cutting power to get ahead of the damage.
Why This Is a Safety Issue, Not Just a Cosmetic One
Cloudy headlights reduce the light that actually reaches the road ahead of you. Severely oxidized lenses can cut output significantly — enough to matter on a dark stretch of US-1 or heading down Wickham Road late at night with oncoming glare. It is easy to dismiss yellowed headlights as just looking bad, but the practical effect is that you are seeing less road than you think you are.
How Long a Proper Restoration Holds Up
Done right — sanded, polished, and sealed with a quality UV coating — you should expect a year or two of real clarity, even in Brevard County’s sun. The variables are how much direct sun the car gets each day, whether it is garaged overnight, and how aggressively the oxidation had progressed before the work was done. A dark-colored SUV sitting exposed in a Palm Bay driveway all day will need retreatment sooner than a garaged car in Rockledge or Viera.
The other thing worth knowing: headlight restoration is most effective when you catch it early. Once the oxidation works deeper into the plastic — or the lens develops crazing, which looks like a fine network of cracks beneath the surface — polishing can improve things but may not bring them fully clear. The longer you wait, the harder the job becomes.